What’s a Remote Desktop?
The definition of a remote desktop is the ability to view and possibly control the UI of a machine from a remote location. It can be extremely powerful when you are helping someone out from another location or when you need to access your own machine when on the move.
Popular solutions include:
- Windows RDP
- VNC
- TeamViewer
- Ubuntu remote desktop
Privacy & Cross-platform support
Many of the options mentioned above come with either privacy concerns (e.g. Teamviewer’s connection goes through their network, meaning they can snoop), or cross-platform issues (e.g. RDP is mostly Windows-only).
To solve both concerns we can set up our own private network and access our machines through this network. We’ll need to install a few tools to set this up.
Tailscale
A VPN service that allows you to connect devices in different locations to a private network. In other words, the devices can access eachother as if they are physically in the same network.
More info: website
Rustdesk
A remote desktop client and self-hosted relay server offering a performant and privacy-friendly experience.
More info: website
Installation
Tailscale
Depending on your platform download the required package and install them.
In my use-case, I’m installing Tailscale on two Linux hosts and a Synology NAS.
Installation on the Linux hosts is trivial:
# Install Tailscale
$ curl -fsSL https://tailscale.com/install.sh | sh

# Start tailscale
$ sudo tailscale up

# Log into tailscale
$ sudo tailscale web
For the Synology NAS, follow these instructions.
Rustdesk server
In my situation, I’ve installed the Rustdesk relay server on my Synology NAS (a DS1019+), but any host that’s always up in your network should do fine (e.g. a VPS or a Desktop).
The easiest way to install the relay server is with Docker, and specifically with Docker Compose. Installing Docker on any machine is pretty straight-forward (see instructions) and on a Synology device it’s even easier.
Paste this into the docker-compose.yaml file:
services:
  hbbs:
    container_name: hbbs
    image: rustdesk/rustdesk-server:latest
    command: hbbs
    volumes:
      - ./data:/root
    network_mode: host
    depends_on:
      - hbbr
    restart: always

  hbbr:
    container_name: hbbr
    image: rustdesk/rustdesk-server:latest
    command: hbbr
    volumes:
      - ./data:/root
    network_mode: host
    restart: always

# Because using docker host mode
# Just in case you forgot the ports:
# 21115 TCP for NAT type test
# 21116 TCP TCP hole punching
# 21116 UDP heartbeat/ID server
# 21117 TCP relay
Then, run the following commands:
# This creates the data folder
$ mkdir data

# This runs the docker containers as a daemon (in the background)
$ sudo docker-compose up -d
Now, when the server has come up, copy the following public key from the data/ folder:
# Find the public key (ed12345 is just an example)
$ ls data/ | grep -i pub
> id_ed12345.pub

# Copy the output
$ cat data/id_ed12345.pub
> Some-Public-Key-You-Must-Copy
Remember this public key, we’ll need it for any clients that want to use our relay server.
Rustdesk clients
Install the client to your machines from the Rustdesk website.
Now, we need to find your relay server on your Tailscale network.
$ sudo tailscale status

100.111.111.111 client-1       erikb@ linux   active;
100.104.111.112 server-1       erikb@ linux   active;  # Relay server!
100.182.111.113 client-2       erikb@ linux   active;
Now, in the Rustdesk client, go to Settings -> Network -> ID/Relay server and input the relay server ip address (in the above example: 100.104.111.112) or the name (in the above example: server-1).
Then, paste the public key into the input field.
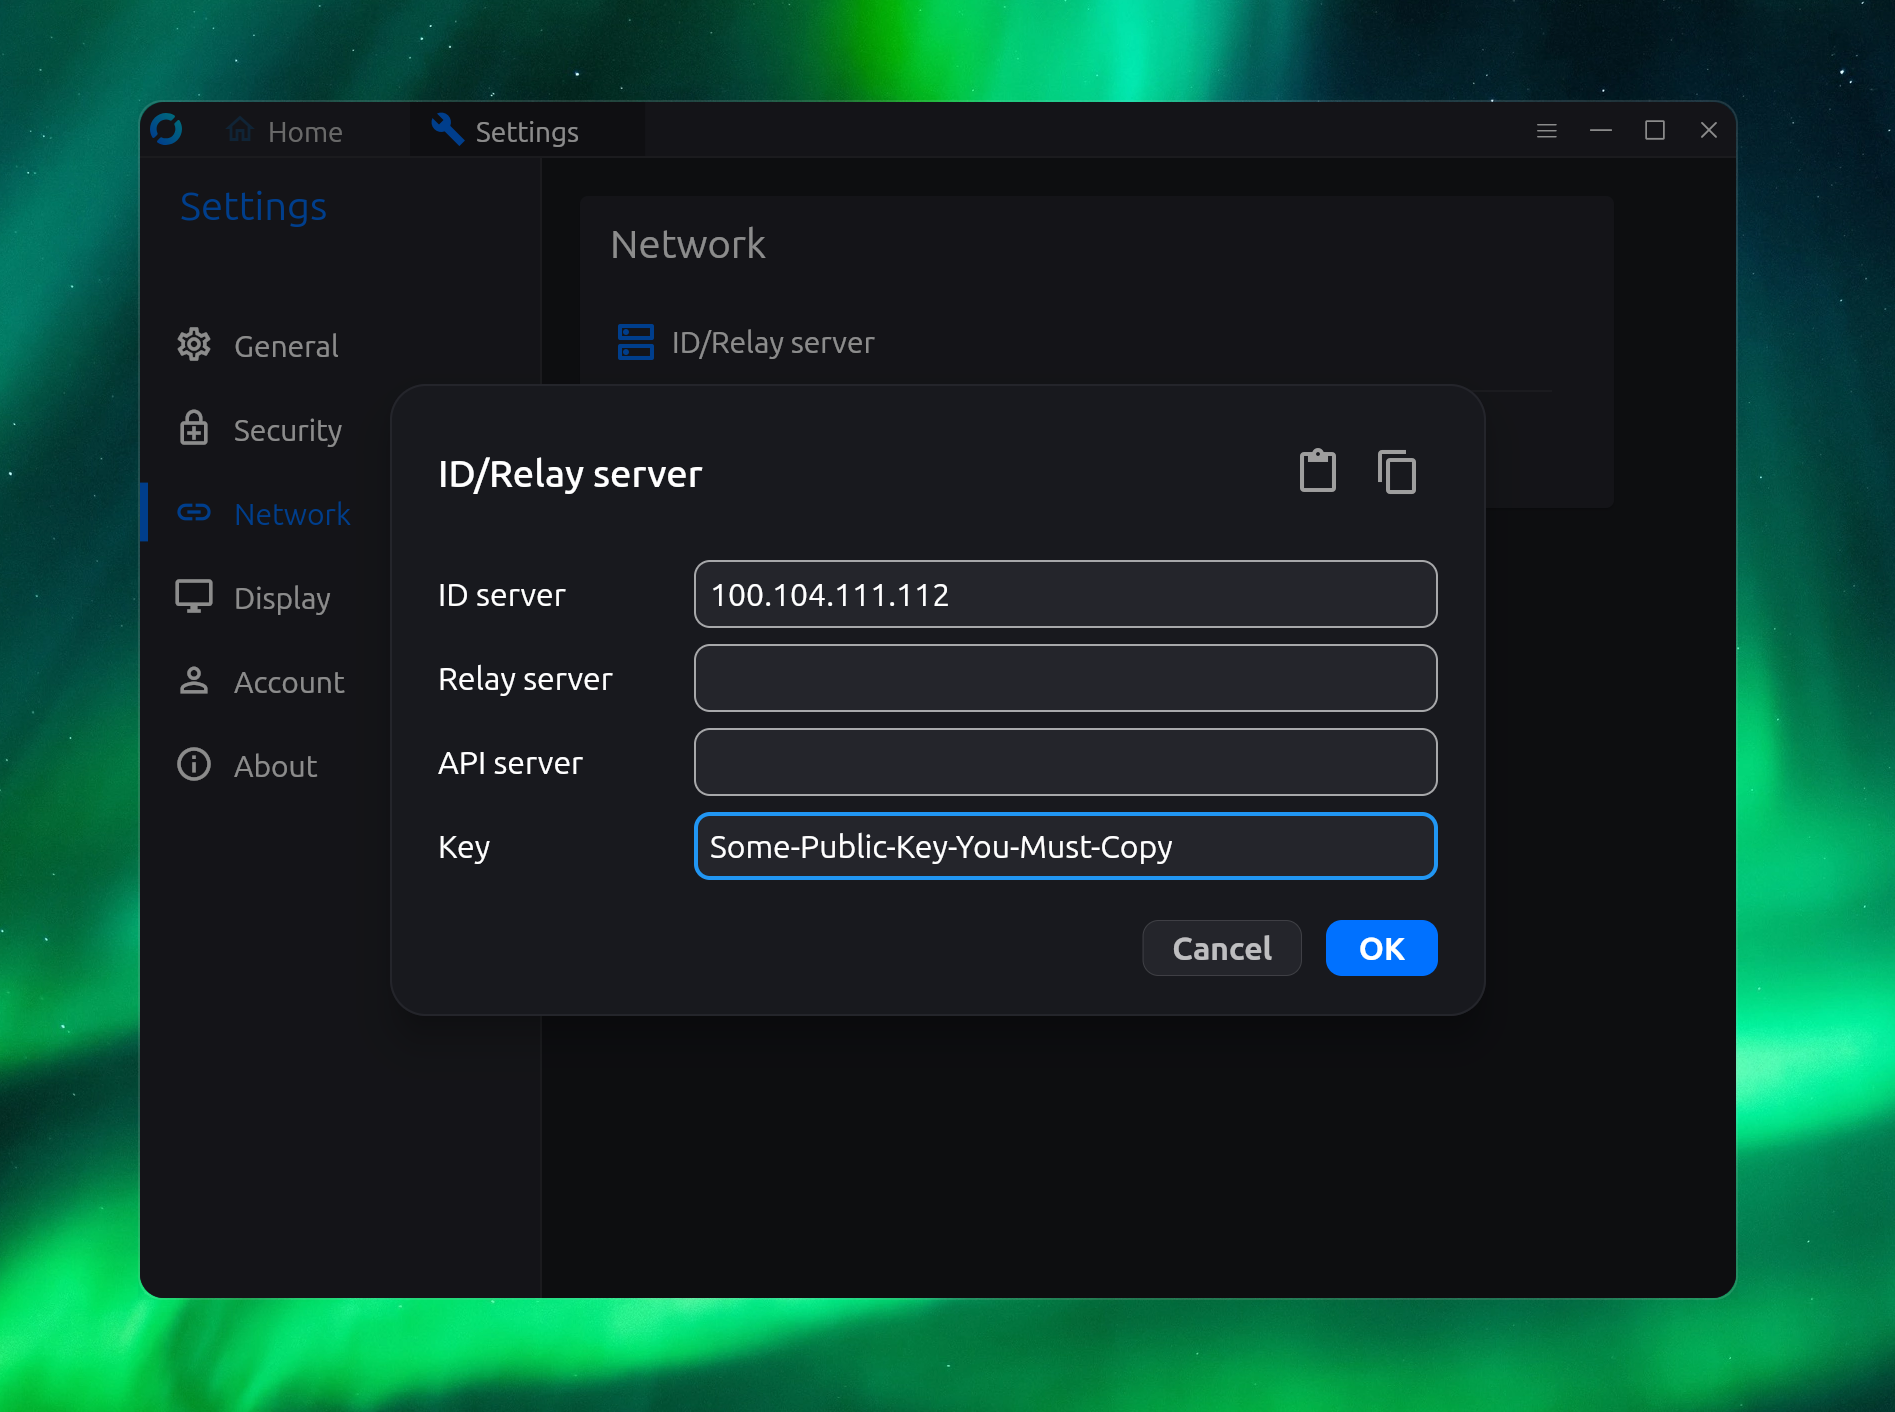
Once you hit OK, you should be all set!
Connecting
What you’ll need now is to copy the IDs and passwords between your Rustdesk clients, to be able to connect.
Through the Settings screen you can set up permanent passwords and 2FA, so you can alway securely log in remotely.
Conclusion
Congratulations! You now have secure and private remote desktop solution, completely isolated on your own private network!